
FORD MUSTANG
Sold  FORD MUSTANG
ABOUT THIS CLASSIC
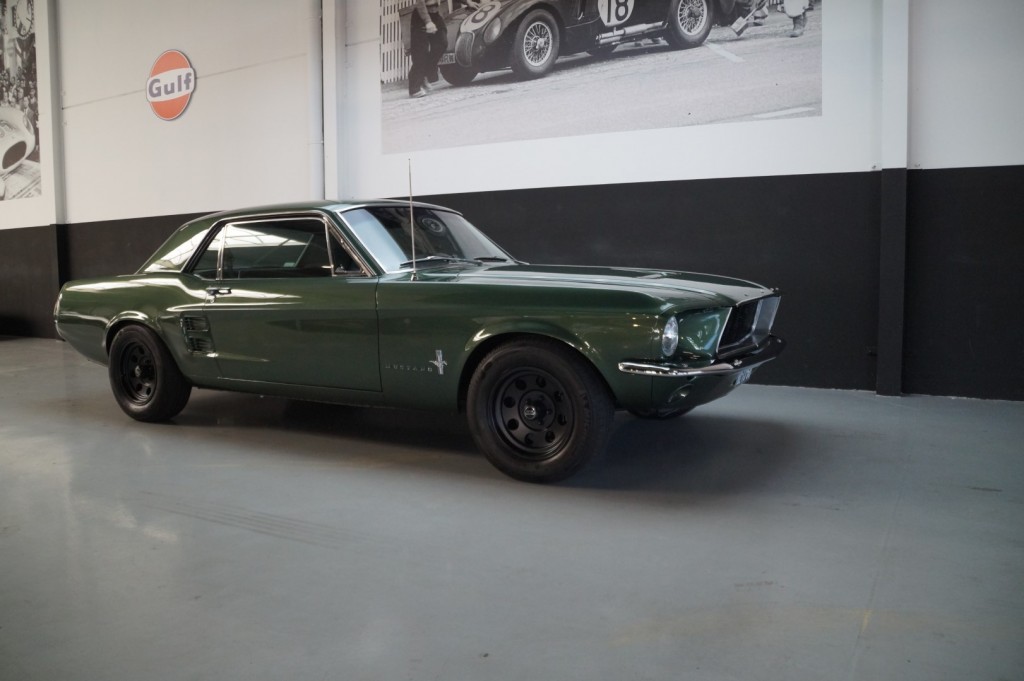
This 1967 Ford Mustang RestoMod has been built with an obsessive, unmitigated attention to detail.
The standard to which the restoration and modification of this Shelby powered beast has been carried out can be called maniacal.
The basic philosophy at the start was to build a car that looks & feels original but handles & performs better than any other ’67 Mustang out there.
Of course, I can give you some highlights like the fact that this is a” body off, Nut & bolt” restoration.
That the real SHELBY engine was ordered and build to the wishes of the builder. That the undercarriage was modified in such a way that the car handles beautifully.
But that will never really convey the full story on this car. So, I will make an exception.
and copy paste the full story written by the builder below. It’s a bit of read so make yourself comfortable!!
QUOTE:
To start with, I have spent some time searching for an original A-code manual transmission. I always wanted, dreamed of having a Mustang, but one that allows for sporty driving. Eventually, I found one in North Holland, a dark green coupe with a manual "four on the floor" transmission. The initial plan was to keep the exterior raw and focus on making it mechanically sound.
Consequently, I took the necessary steps to register it (as it still had its American license plate) and also bring it up to a good technical condition. This mainly involved the following:
Engine:
The engine originally installed was a worn-out 302. In 1967, a 302 wasn't used yet; it was introduced in 1968. Therefore, I decided not to rebuild the 302 but to have a new engine built in the USA, specifically a 289 block. At that point, the idea arose to take inspiration from the Shelby models. Shelby small-block engines, as you may know, are essentially K-code 289 engines with Tri-Y headers, a larger carburetor, and a Shelby intake manifold. The K-code blocks are the regular 289 blocks but feature pressed-in studs, thicker connecting rod bolts, solid lifters, a different camshaft, and a heavier harmonic balancer. I followed that exact route and also had the intake and exhaust ports ported to enhance the engine's breathing ability. It was expected to deliver 300 horsepower, though I never had it tested. One thing I particularly enjoy is the sound of the engine above 3000 RPM; you can feel and hear it really come alive, just as Shelby envisioned.
To delve into some engine details:
The carburetor I ended up using is an Autolite 4100, the exact K-code carburetor with some internal modifications to ensure better fuel flow at high RPMs. It's worth mentioning that Shelby models have a Holley 750 carburetor, which is correct. However, after consulting various experts, including the engine builder, they all advised against using a Holley carburetor as they are somewhat oversized for street driving. That's why I opted not to go down that route. The carburetor has a manual choke with the original choke cable and knob, just like the Shelby models.
The ignition system features a Shelby distributor without a vacuum advance (which improves fuel consumption but isn't a priority for Shelby models). It's combined with an electronic Pertronix module and Flamethrower coil.
Various components around the engine have been replaced, such as throttle linkages, the air filter housing, temperature and oil pressure sensors, V-belt, alternator brackets, and all bolts on and around the engine.
One neat detail is that Shelby modified the valve covers on the Trans-Am racers with two taller filler caps, eliminating the PCV valve. I had that modification done, including the exact stickers. An important modification is that I built a closed PCV system with the check valve in the hose. I drove around for two years with an open system, which is fine for the racetrack but tends to make the engine bay quite oily due to the oil vapors. This closed system works better for street driving.
The toploader transmission was inspected and fitted with new gaskets and seals. It's still in good condition.
Both the engine and transmission are mounted on new mounts, with the engine having special polyurethane mounts. It sits quite firmly in the car.
1.Front suspension, steering system, and brakes:
Naturally, I completely renewed the entire front suspension and brakes. In addition, I converted them to disc brakes with ABC Yellowstuff brake pads (to ensure proper braking), although you need to brake a few times initially to warm them up. The front brake lines are made of Teflon, and of course, there is a new master cylinder. The rear brakes are the drum brakes that came with the car from the factory, but they have been completely overhauled with all new components (shoes, hardware, handbrake cables, brake hoses, and cylinders).
The front suspension is also entirely new. As mentioned before, I opted for a complete set from Opentracker Racing. Opentracker Racing produces suspensions that use roller bearings instead of rubber bushings, resulting in improved suspension movement and better handling. This applies to the spring perches, control arms, and even the idler arm of the steering system. These components are not just refurbished but genuinely new. Additionally, the car features the Shelby drop introduced by Shelby, which alters the camber and allows for improved cornering. I also installed new, American-made bearings, seals, and other related parts, avoiding cheaper Chinese alternatives. Furthermore, I added a new, stiffer sway bar and the corresponding polyurethane bushings, not only in the front but also at the rear. I also replaced all the shocks with new Koni shocks.
The steering system is also brand new. I installed a new steering box with a quicker ratio, similar to those used in GT and Shelby models. It is accompanied by all new steering arms, flex bushings, and bolts. No detail was left to chance.
1..Wheels and tires:
I chose the black American Racing wheels (Shadow wheels). At the time, a few years ago, the car had new Cooper Cobra tires. Please refer to the following information regarding the current tires.
2.Lighting:
To ensure the car meets the necessary technical requirements for road use, I had to ensure the lighting system was in proper working order. I modified the taillights to LED lighting for increased visibility, and I upgraded the headlights to halogen. This involved not only replacing the bulbs but also adjusting the wiring so that the additional power comes directly from the battery voltage, using relays as well.
After that, I drove the car for a few years. It was enjoyable, but I started to notice my perfectionist tendencies taking over. Additionally, there were some areas of rust, including the cowling. Therefore, two years ago, I decided to fully tackle the car. It was completely disassembled, and the following work was done:
Bodywork (see also the photos on the USB stick included in the blue folder).
I completely sanded the car down to bare metal. That's the only proper way to do it. It had eight layers of paint, so you can imagine what came off. There was also quite a bit of filler. Then, V&G Restorations from “Woerdense Verlaat” further stripped the car (edges, etc.), removed the engine, and everything from the engine compartment and interior, and began the welding work. Overall, the welding work included the following:
Both rear fenders were completely replaced. They were in poor condition and poorly repaired, so they had to be taken out completely.
New hood, as the old one was too dented.
New trunk. The old one showed the frame through it.
New cowling.
Drip rails replaced where necessary.
Various smaller rust spots were repaired.
Front and rear valance replaced.
There was quite a bit of rust on one of the chassis rails in the engine compartment, so it was entirely replaced.
Floor pans were replaced, partially on one side and entirely on the other side.
2.Finishing
After the welding work, the car was meticulously smoothed out. Special attention was given to the panel gaps to ensure they were neatly aligned. Spies Hecker automotive paint, known to be a high-quality brand, was used. All seams were properly sealed with caulk.
3.Painting
The car was then painted in its original colour, Dark Moss Green. As is customary, the trunk area, interior of the trunk, and the underside of the hood were painted to match. The engine compartment itself was finished in a neat semi-gloss black. Normally, this is done with a spray can, but not in this case. It was professionally sprayed, including a clear coat. The separate parts (including headlight bezels, etc.) were all painted individually. V&G Restorations also reassembled and properly aligned all the components. The underside was also stripped and treated with an underbody coating.
4.Further body assembly
During the further assembly of the body, the following noteworthy points were addressed:
Internal sections of the frame were treated with rust protection.
New bolts and nuts were used throughout.
New hood hinges (you can feel that they're still a bit stiff).
New door hinges.
New inner fender liners, including rubber seals.
5.Reassembling Suspension and Rear Axle
After the bodywork was completed, V&G Restorations reassembled the suspension. It had only been driven for about 1,000 km, so there was no need for further work. However, they also overhauled the entire rear axle. The car was originally equipped with a limited-slip differential, and that has been reinstated. New axle shafts were installed, along with brand new bearings and seals. We opted for a slightly different final gear ratio to improve usability and reduce engine revolutions. It is now 3.25. If you look at the rear axle, you'll see the original type plate as well as a newly stamped plate. A photo of it is included on the USB (among the 1,000 photos). Additionally, new poly bushings, bolts, and U-clamps were used.
6.Further Assembly by V&G Restorations
Since I wanted to receive the car back in a drivable condition for further completion, V&G Restorations also reinstalled the engine. A new clutch was installed because the one that had been put in a few years earlier was causing some shaking, which was unacceptable. The clutch transmission was also replaced with a new one. We also fitted new tires (Michelin) because the previous Cooper tires had extremely poor grip. These tires provide excellent traction on the road. They do make some noise, but that's to be expected.
V&G Restorations also built the cooling system, which includes a new radiator (aluminium, but with the original design, not a square block as it looks incredibly ugly), new hoses, a new heater, and heater motor. Every aspect had to be perfect. Additionally, the entire fuel system is brand new, including a new pump, tank, float, and hoses. Of course, new bolts were used throughout. We also installed the Shelby fuel cap, along with a new filler tube and rubber.
Finally, there was a crack in the windshield, so it has been replaced along with the rubber seal. The rear window rubber seal is also new, but the original window was reinstalled, complete with the (I believe) 1994 sticker indicating its previous use in the US.
Exhaust
What hasn't been mentioned yet is the entire new exhaust system. For the first few years, I drove with the original exhaust system. It was nice, but you could feel that the car couldn't breathe freely with it. So now I have installed new long-tube headers from JBA, ceramic coated, combined with a complete stainless-steel system from “Magnaflow”. That's the best exhaust for a Mustang. Often, people choose the cheaper “Flowmaster” option, but in my opinion, it sounds a bit too high-pitched.
After that, I continued building the car myself, which included:
1.Taillights
Reinstalling the LEDs, but now with new chrome bezels, housings, rubbers, and seals.
2.Door handles, etc.
New chrome door handles, new locks, new chrome mirror, new trim on the hood, new emblems, and letters. Also, new latch strikers. They are often painted over, which looks ugly, so I replaced them with new ones.
3.Rubber components, etc.
All the rubber components are also new. This includes door seals, trunk seals, door latch rubbers, hood buffers, hood seals, window seals, vent window seals, as well as window fuzzies (I secured them with stainless steel micro screws. There's no brand that makes them that stay in place. Often, you see them hanging half-loose. That won't happen here).
Wiring and Electrical:
In the end, I decided to go for a completely new wiring harness with an improved fuse box. There were some issues with the original wiring that needed repairs, and I didn't feel confident relying on it. So, it has been completely replaced. Additionally:
• New turn signals and wiring on the hood
• New parking lights and reverse lights
• Entire instrument cluster renewed. We may need to discuss the mileage because it was reset to zero at the time of purchase. The original mileage is 70,750 miles, but it's not visible on the odometer anymore. Personally, I have no issue with it, but we might need to check if a buyer finds it problematic. It shouldn't be a deal-breaker, and it can be easily adjusted when removing the odometer.
• Interesting detail: The car now has a functioning seat belt warning light. This is usually broken in Mustangs. However, in this case, it illuminates in red when the ignition is on and turns off after approximately 8 seconds using a NOS relay.
• Various switches replaced, such as door switch, light switch, turn signal switch, cigarette lighter.
• Added interior lighting (always looks nice in the footwells).
• New heater and wiper switches.
• New horns (obtained from “Cobranda”, they offer the closest to original-looking horns).
• New Red Top battery (was already installed when I initially started the engine), as well as a new battery tray, holder, clamps, and cables.
• New voltage regulator.
Interior:
Moving on to the interior. Here's what I've done. It's mostly brand new:
• New dash pad from Mustangs to Fear (best fit).
• New sun visors.
• New carpet.
• New underlayment.
• New seat hardware (front seats not reupholstered yet, but new covers are in the back).
• Rear bench seat reupholstered.
• New seat belts, with three-point belts added to the front seats. Anchor points were created in the pillars during the bodywork process, as originally intended by the factory. Hip belt in the rear.
• New kick panels.
• New original rubber mats.
• Quarter panels and interior of doors painted in satin finish (by the bodyworker, not with a spray can, but done properly).
• New door panels, new interior door handles.
• New window cranks.
• New rearview mirror.
• Various new bolts and nuts.
• New glove compartment (not just the door, but the entire interior).
• Custom “Autosound” radio, with new JBL speakers and new speaker wires.
• New heater control cables and a new front panel (including all other dashboard front panels).
• Overhauled windshield wiper motor.
• And of course, an original “Nardi” steering wheel. Not a cheap Grant steering wheel, but the real deal, with genuine wood.
• New pedal rubbers and a brand-new gas pedal.
• New handbrake lever.
• New shift knob.
1.Chrome and more
It's worth mentioning that the chrome on the quarter windows and vent windows has been re-plated. Often, ill-fitting reproductions are used, but I disassembled everything and had the original frames re-chromed. One quarter window frame was broken, so I managed to find an original replacement. I also obtained NOS (New Old Stock) wiper arms and new original Trico wipers. Additionally, there are new washer nozzles and hoses, including a new reservoir. I installed a new chrome antenna as well. The grille and the chrome surrounding it are all brand new. There are also new Ford-logoed running boards.
2.Finishing touches
If you're a perfectionist like me, attention to detail is crucial. Therefore, the original stickers have been carefully applied, as you can see. The original door plate has been reinstalled using authentic Ford pop rivets.
END QUOTE
If you are still here. You have read the whole story above & you are looking for a great Mustang, I do not think there is any reason not to contact us.
One thing is certain. Our stunning ’67 Mustang Restomod is ready for any road adventure!
Pictures of the whole restoration process can be provided on request.
This Mustang has Dutch paperwork which makes it easy to register in any Eu country.
Call 0031623679846 for more information.
We ship to any location in the world. Ask our partner FreightHammer for a free shipping quote! (http://www.freighthammer.com/)
Wir sprechen Deutsch, We speak English, Nous parlons Français, Wij spreken Nederlands.
CAR DETAILS
Model
RestoMod Shelby Powered (1967)
Body
Sportscar/Coupe 2drs
First registration
1967
Color
green Metallic
Engine
4700 CC

Appointments only
Monday - Friday: 10.00 - 17.00
Saturday: 10.00 - 14.00
